Update Stride
Beginner
Updating Stride is a straightforward process, but it's important to follow the steps carefully to ensure a seamless transition. Below are the guidelines for updating both the Stride engine and your existing projects.
Note
The instructions provided here can be used as a general guide for updating to any new version of Stride.
Updating Stride
In the Stride Launcher, look over to Switch/update version and press the update button next to the version you are using.
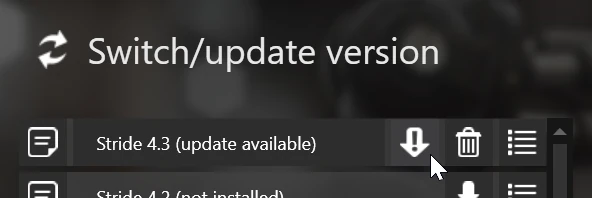
Major and minor releases will appear as a separate version in the list and will require manual installation.
Alternatively, you can update the engine from the terminal using the Stride CLI:
# Update all installed engine versions
stride update

# Update a specific engine version
stride update 4.3
Updating your IDE
Make sure you are using the latest version of your IDE of choice to ensure compatibility with the latest version of Stride. Some IDEs might also require you to restart your computer to apply the changes fully.
Updating your project
Make sure your project can be built. The upgrade process can modify some of your code, which requires all
.csprojfiles to be compilable.(Recommended) Commit all changes to version control. This will provide a safety net, allowing you to revert the update in case something goes wrong.
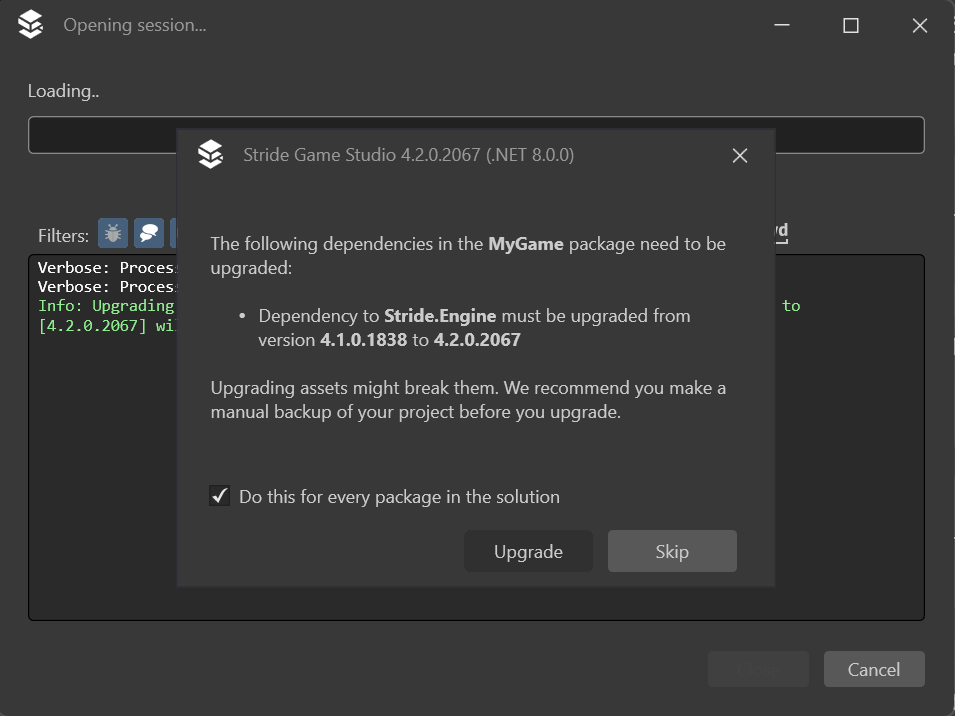
Open your project with the newer version of the engine. You will be asked if you want to upgrade a package. Make sure to select to do this for every package in the solution and press Upgrade.
Tip
If you are not using version control, it's recommended to enable the option to backup modified files. That way, if something goes wrong, you will be able to easily revert the changes.
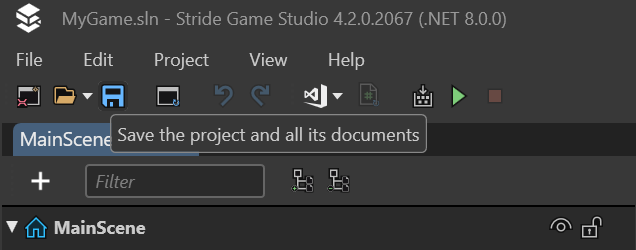
After Stride finishes updating the project, it's crucial to save it immediately. This step prevents the project from being in an undefined state and solidifies the changes made during the update.
Updating your project with Stride CLI
Project updates can also be performed from the terminal with Stride CLI.
Note
We recommend using the CLI tool over the dotnet package update command, as it will also update some of your assets and code to ensure it works correctly with the new version.
Close Game Studio to make sure it doesn't override anything.
Make sure your project can be built. The upgrade process can modify some of your code, which requires all
.csprojfiles to be compilable.(Recommended) Commit all changes to version control. This will provide a safety net, allowing you to revert the update in case something goes wrong.
Run the following command in order to update your project to the latest version of Stride:
stride upgrade path/to/your/projectIf you want to update to a specific version of the engine, you can define it with the
--versionflag.stride upgrade --version 4.3 path/to/your/projectTo view a list of all available flags and parameters, run the following command:
stride upgrade --help
Reverting a project update
In case something went wrong during the update or a newer version of Stride has a bug that prevents your game from working properly, you can revert your project back to the previous version of the engine.
Tip
Before reverting, try to identify what happened and open an issue on Stride's Github page that describes your problem, so that it can be resolved in a future update.
Reverting with version control
If your project is using version control, it can be easily reverted to a previous state.
Close Game Studio to make sure it doesn't override anything.
Use your version control software to restore all changed files.
Change the engine version in the Stride Launcher to the one your project was previously using. For more information on how to do this, visit Manage versions.
Open your project and verify that there are no issues.
Reverting without version control
If your project is not using version control, but you have selected the option to backup modified files during the project upgrade, then you can restore it to the previous state from that backup.
Close Game Studio to make sure it doesn't override anything.
Open your project's folder.
Locate a folder that starts with
.stride-backup(you might need to enable viewing hidden files depending on your OS).Copy all of it's contents to your project's root directory and select to overwrite existing files.
Change the engine version in the Stride Launcher to the previous version. For more information on how to do this, visit Manage versions.
Open your project and verify that there are no issues.
Reverting without version control or backups
If your project isn't using version control and you haven't selected the option to backup modified files during the project upgrade, then you might still be able to manually revert all of the changes.
Note
This is why using version control is recommended.
Close Game Studio to make sure it doesn't override anything.
Open your project's folder.
Manually go over every
.csprojfile and change the version of all Stride packages to the one you were previously using. You can view all available versions of the engine on nuget.org.Resolve all issues in your code.
(Recommended) Start tracking your project using version control software such as git in case something breaks again in the future.
Change the engine version in the Stride Launcher to the one you were previously using. For more information on how to do this, visit Manage versions.
Open your project and verify that there are no issues.